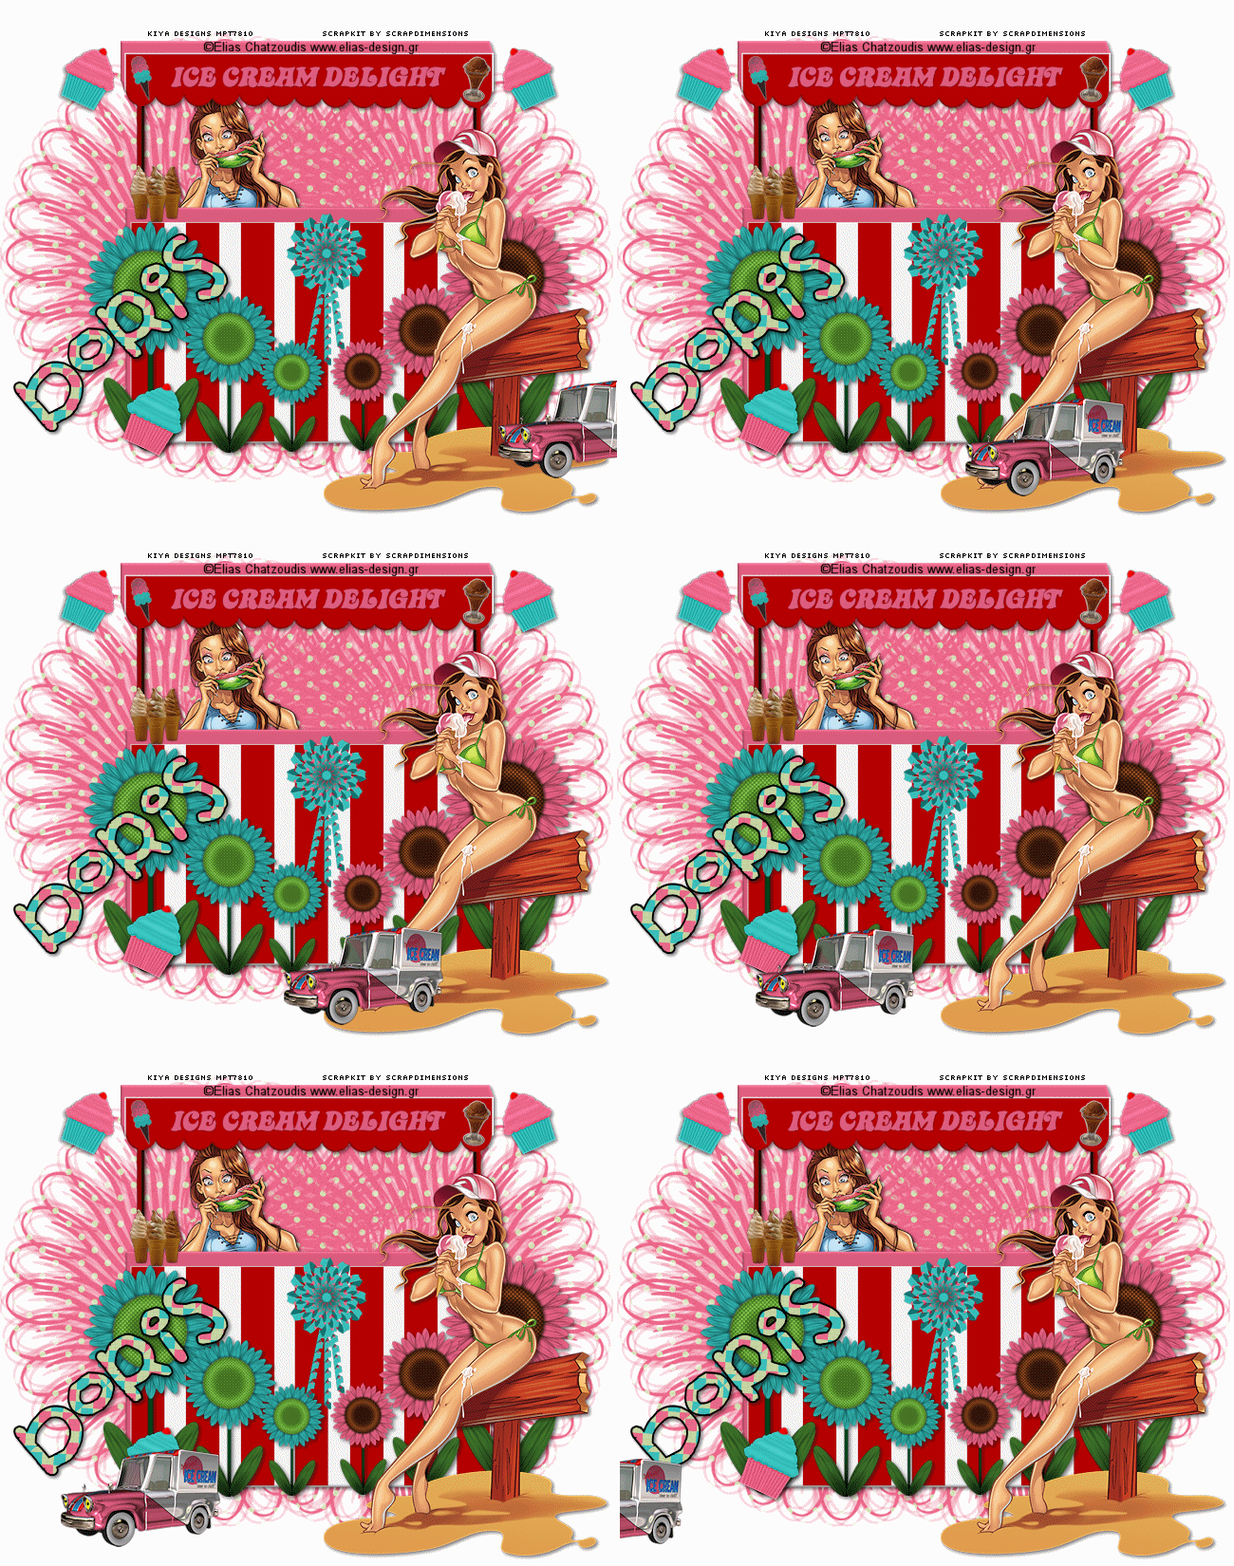
ICE CREAM DELIGHT

SUPPLIES NEEDED
Two tubes of choice – I’m using ones from Elias Chatzoudis. You must have an ELIAS license to use them.
Fun new scrap kit Ice Cream Delight by Scrap Dimensions – Download Here
Mask by Weescotlass & Animated truck by yours truly – Download SUPPLIES
Font of Choice or FB Punkypie
Animation Shop 3
1. Open new image – 650 x 550 – Raster checked. Transparent unchecked – color white.
2. From scrap kit, choose ‘Ice Cream Stand’ – copy and paste as new layer on your working image. Image - Resize by 25%. Move towards right side of image. (Although this depends on the tube you’re using. I had to move mine to the right so my tube would look better. If you’re using something different, you’re welcome to leave it centered on the image.)
3. Add a light drop shadow to this. V & H set to 2. Opacity 50. Blur 5.
4. Open your tubes. Copy and paste on your image – depending on their sizes, resize as needed so they fit well – position as deem fit. Add same light drop shadow as above.
5. Open Sunflowers (2 of them) from scrap kit. Copy and paste each as new layer and resize by 20%.
6. Move flowers to opposite ends of the stand. Duplicate each flower and keep resizing by 70%, moving them towards the center until they meet.
7. On your layer palette, click on the ‘eye’ of the white background, the ice cream stand and your tubes to close them. Making sure one of your flower layers is active, go to Layers – Merge – Merge Visible.
8. Add same drop shadow as above to your flowers. Click on the ‘eye’ again to open up the other layers.
9. Select Paper 4 from scrap kit. Image – Resize by pixels – 550 x 550. Copy and paste as new layer right above the white background of your working image/tag.
10. Open your WSL Mask. Layers – New Mask Layer – From Image – Choose the mask from the drop down menu, making sure ‘source luminance’ and ‘invert mask data’ are both checked. Click OK.
11. Delete and merge group for your mask. Move the masked layer a little to the left of your tag. Layers – Duplicate. Image – Mirror. Layers – Merge – Merge Down.
12. Time to add whatever other elements from the tag you’d like to use. I used the cupcakes and the pinwheels – resizing and arranging around the image. Have fun with it.
13. When satisfied, time to add your tag and copyright information on a new layer.
14. For the name, I used the font FB Punkypie. Vector. Size 90. Stroke width 2.0. Foreground – black, background set to pattern (open one of the papers from the scrap kit and leave open on your workspace – go to ‘pattern tab’ and select the paper for your background). Use nodes once your name is written to rotate and position as deem fit. Once done, convert to raster layer.
15. All done? Great. It’s time to animate!
16. There are two ways you can do this:
METHOD 1:
1. Merge all the layers together in PSP and duplicate 8 times for a total of 9 layers. Save this as a PSP image.
2. Go to Animation Shop. Open and search for your PSP image file. Open and all 9 frames should be laid out for you. Edit – Select All.
3. Open animation – moving truck- and you’ll see it also has 9 frames. Edit – Select All.
4. Making sure you’re on the first frame of the ‘moving truck’ animation, click on image and drag the truck into the first frame of your tag. Make sure truck is position at the edge of the right side of your tag (so it looks as if the truck is coming out from there).
5. Once set, go to Animation – Frame Properties – change number to 15.
6. View – Animation and you’re all set!
METHOD 2:
1. Once done with your tag in PSP – Edit – Copy Special - Copy Merged.
2. Go to Animation Shop and paste as new animation.
3. Holding down the Ctrl key, press on the ‘L’ key 8 times, so you get a total of 9 frames. Edit – Select All.
4. And then simply repeat steps 3 – 6 above.
Thanks for trying the tutorial and I hope you enjoyed making the tag! Below is another creation using the same scrap kit.

Please no hotlinking the images! Neither can you use the tags created for your personal use or on blogs or websites without written permission. This tutorial is registered with TWI.
© KiyaSama - all rights preserved. Tutorial Written 8th May, 2009.
Tutorials Home
|
|