
MOVING SCREEN
SUPPLIES NEEDED:
3 tubes of choice – I’m using ones by Ted Hammond. You must purchase or have a CDO license to use them. You’re also welcome to use tubes of your choice.
Plug-ins – MuRa Meister’s Copies, DSB Flux-Linear Transmission, VM Extravaganza – Transmissions.
Mask by Vix | Template by Me | Stockphoto image provided or image of choice
Download SUPPLIES
Brushes of choice (preferably those with Chinese characters/calligraphy)
Fonts of choice or – Carnasie Slab JL, Cinnamon Roll
Animation Shop 3
1. Open template provided.
2. Magic wand, click inside each rectangle, making sure your settings are on Add(Shift) or you can just hold down the shift key. Tolerance on 10. Feather 0.
3. Selections, Modify, Expand by 2.
4. Open stock image provided or one of choice. Image, Resize by 132%. Copy merged and paste as new layer above template.
5. Selections, invert, delete. Move this layer below black frame/template.
6. Deselect and apply VM Extravaganza – Transmissions on these settings:
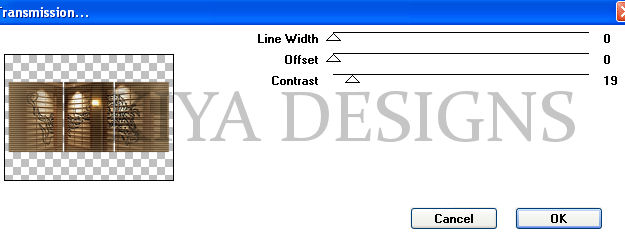
7. Go back to your black template. Select the first rectangle with same magic wand settings we used above. Expand by 2 again. Undo the resize of the interior image, then copy and paste as new layer. Position as you’d like, selections, invert, delete. Do not deselect yet!
8. Move below black frame and duplicate this twice for a total of three layers.
9. Close out top two layers, and on original (non-transmissioned layer), go to effects, plug-ins, MuRa Meister Copies, Line on these settings:
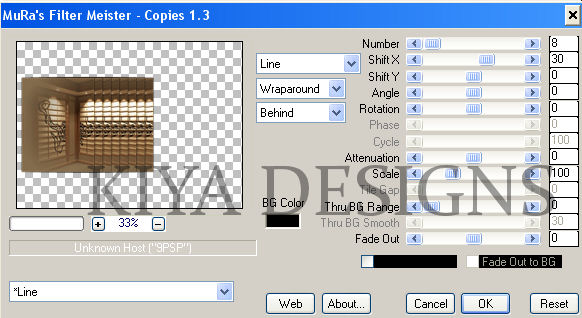
10. Close out this layer and go to the next (Copy 1). Set X Slider to 50. Close out this layer and on the topmost (Copy 2), set slider to 70. Deselect.
11. Now (be careful!) duplicate the ORIGINAL meister layer (Raster 3) and Copy of Raster 3 and then arrange your layers to look like this below:
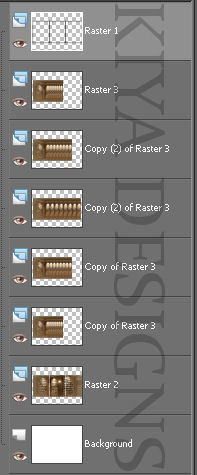
12. Got it? Great! I think we’re all done with the hard part now *lol* Close out all these layers except for the ‘transmission’ layer, white bkg and black template.
13. Going back to your template, click on the first rectangle – selections, modify, expand by 2 and paste your first tube. Resize if needed (mine was resized to 80%). Selections, invert, delete. Add light drop shadow (1,1,50,5).
14. Repeat step 13 for the next two tubes. For your middle tube, double click on the layer template and change blend mode to Luminance Legacy.
15. Apply dropshadow to your black template frame – 3,3,50,5.
16. Pick a darkish color from your tube and set as foreground. I’m using the brown tone. Create new layer above white background, flood fill with this color.
17. Effects, plugins – DSB Flux – Linear Transmission on these settings:
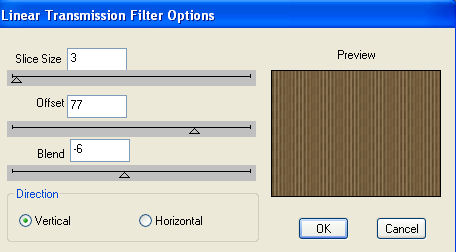
18. Open up mask image. Go to Layers - Mask from Image - Source luminance and invert data checked. Choose mask from drop down menu. Click on OK. Delete middle mask layer (answer yes to question asked) then right click on topmost mask image and choose ungroup layers.
19. With your foreground color still on the original color chosen, create new layer above mask layer and apply your brushes of choice – since this is a Chinese theme (of sorts) I’m using several Chinese character brushes.
20. Once satisfied with brushes, time to add your fun phrase of choice. I’m going with ‘Screen Sirens’. Using the font ‘Carnasie Slab JL’ – size 26 – foreground on white, background (same color you used for your mask and brush), strokewidth 2.0, vector, kerning 500. Drop shadow when done.
21. Now add your name (I used the font Cinnamon Roll) and copyright info and license. All done? Huzzah! Time to animate!
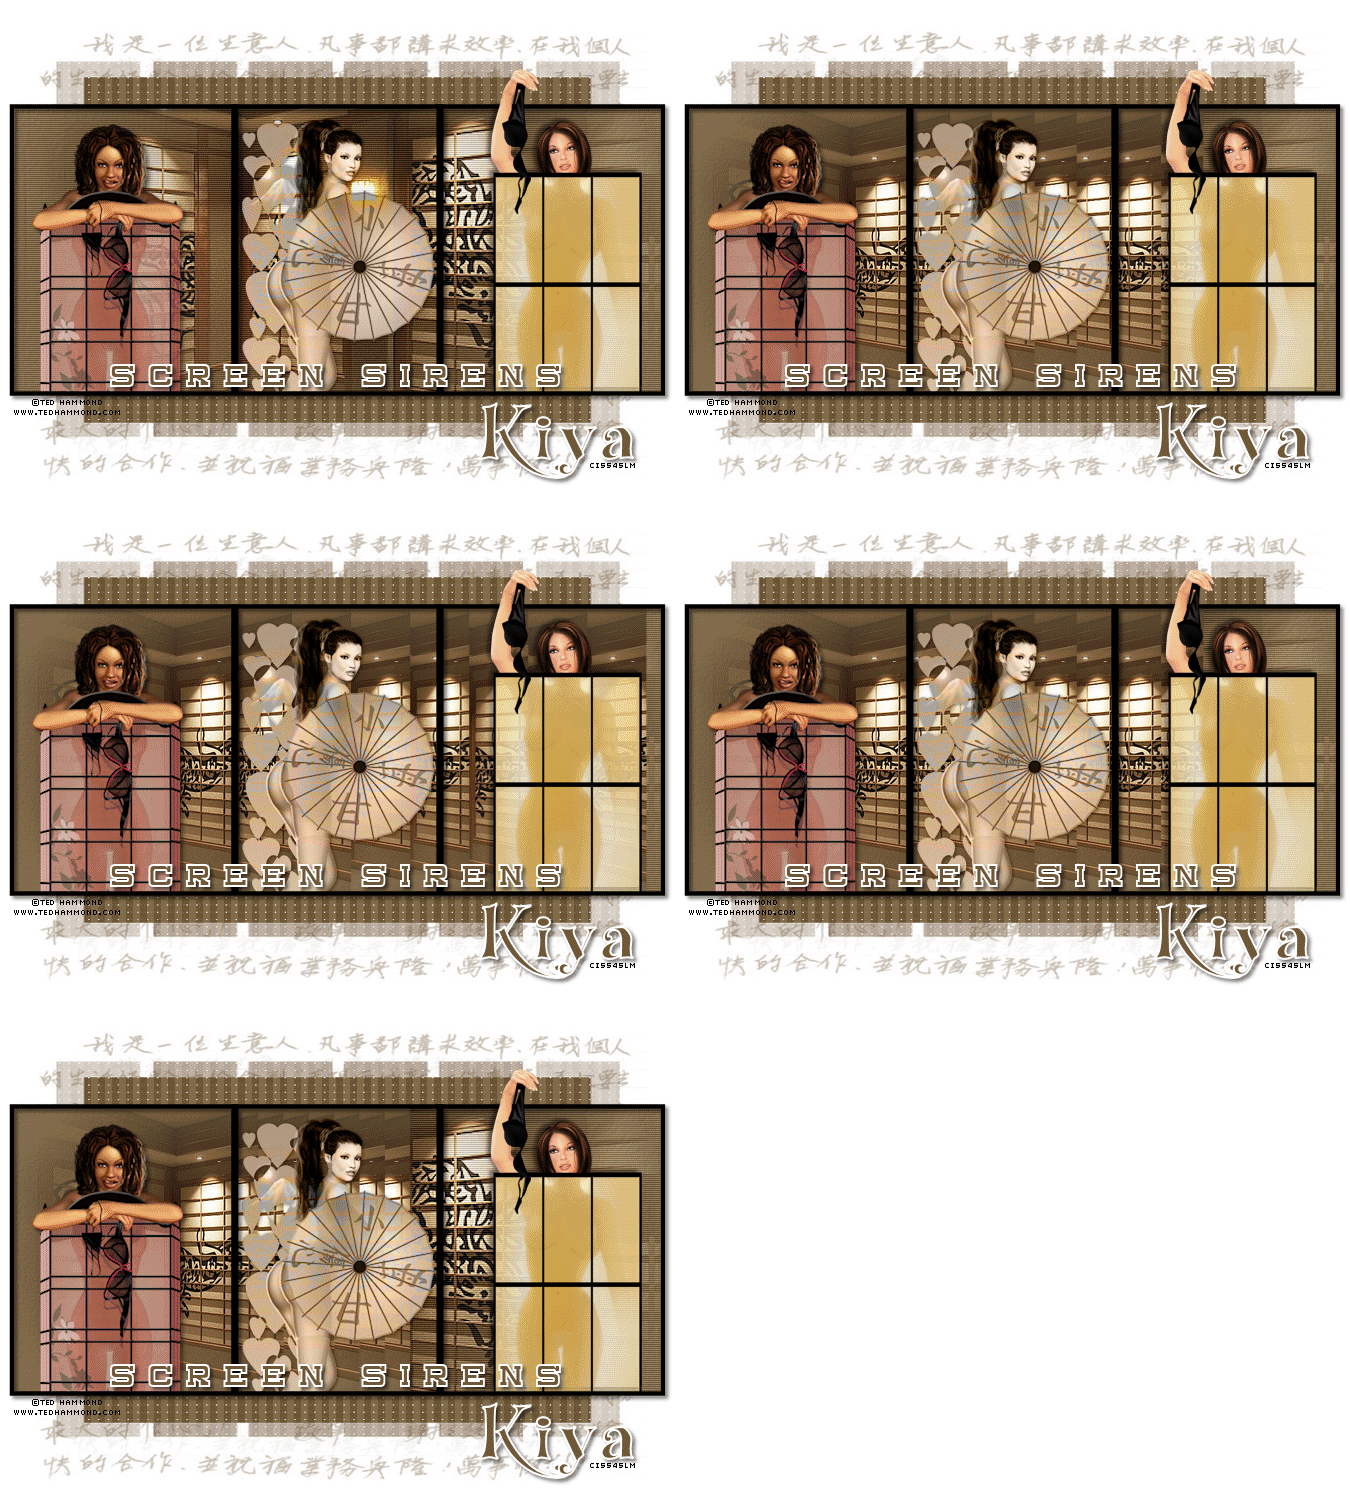
22. Let’s go back to all our closed out meister copies layers, going accordingly, we’ll open the very first layer which should be ‘Copy of Raster 3’. All good? Great. Copy merged and paste as new animation in Animation Shop.
23. Go back to PSP, close out this layer and move to the next, which should be the second ‘Copy of Raster 3’ – look at shot above if you get confused – go to AS and paste after current frame.
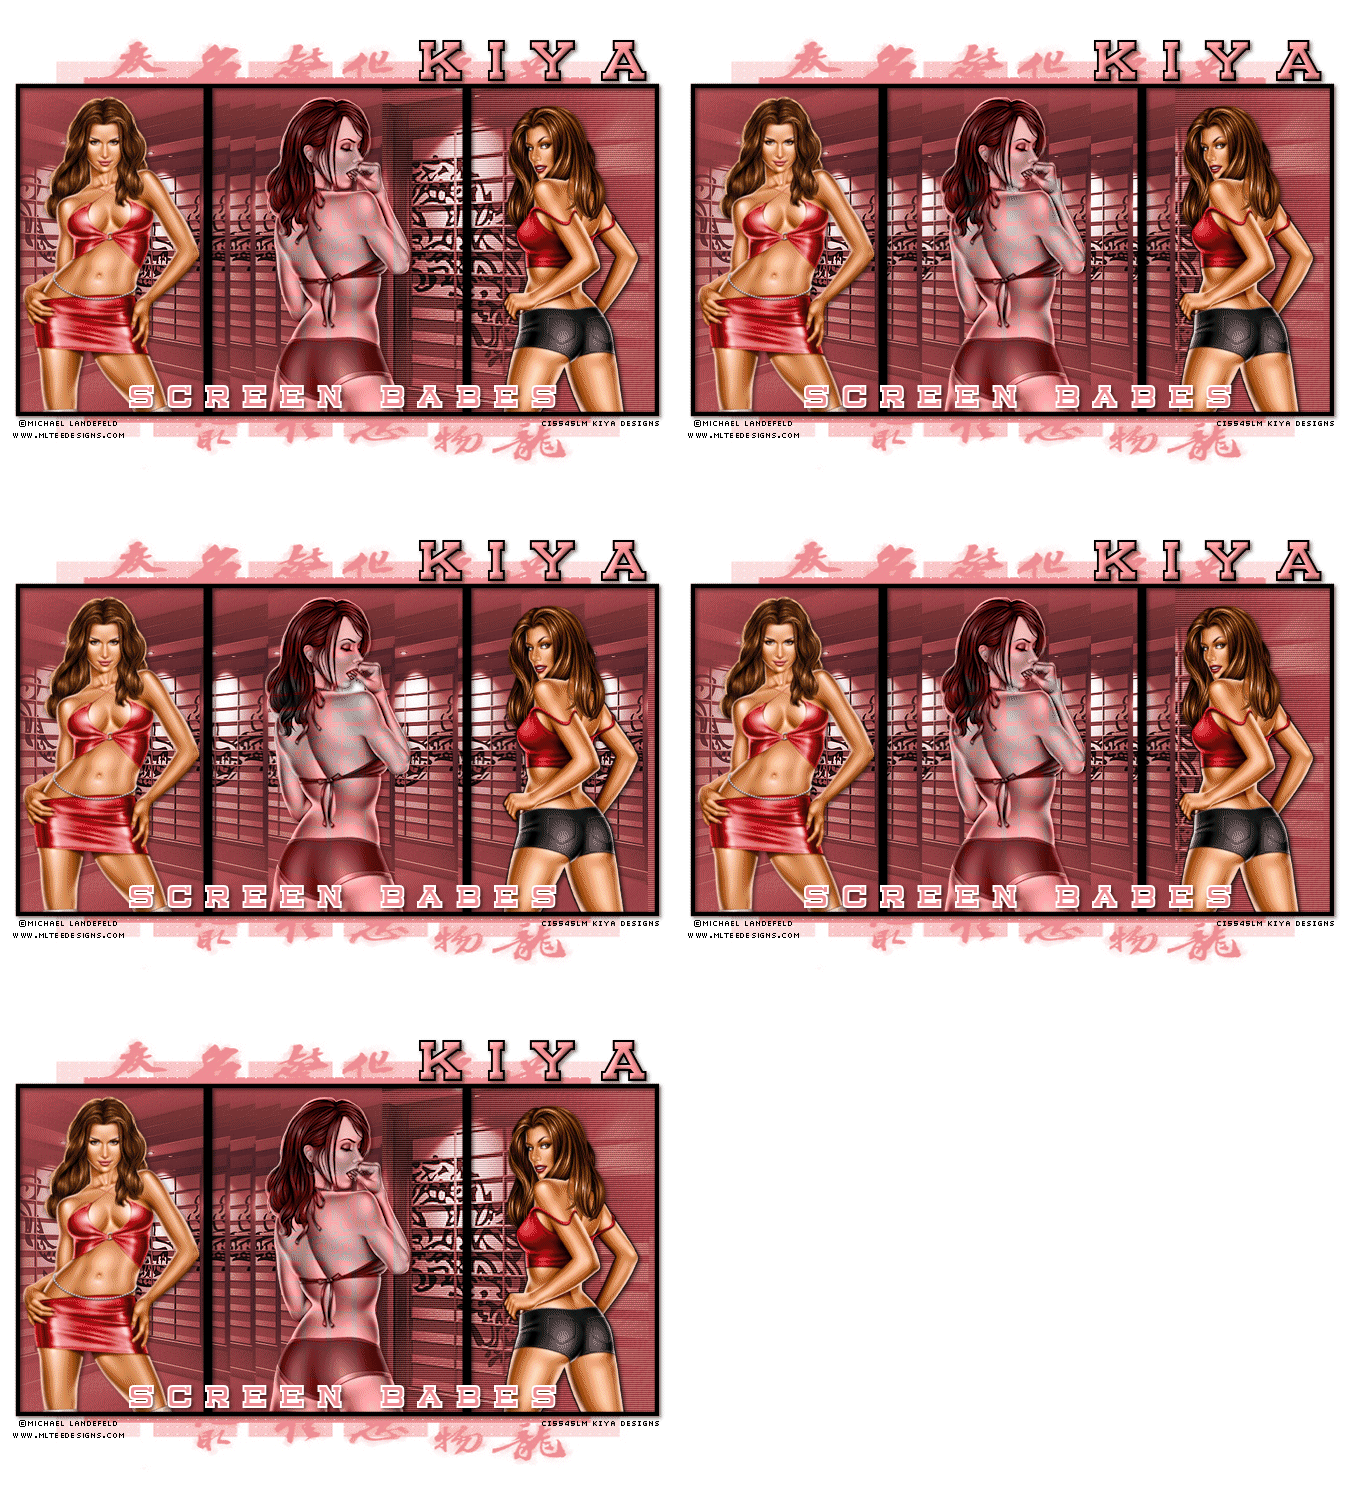
24. Repeat this process for all the other layers until you have five frames in AS.
25. In AS, edit, select all, then go to Animation, frame properties set to 100.
26. View animation and you’re all set!
27. Below is another version of it. Hope you had fun with the tutorial!
Please no hotlinking the images! Neither can you use the tags created for your personal use or on blogs or websites without written permission. This tutorial is registered with TWI.
© KiyaSama - all rights preserved. Tutorial Written 6th April, 2009.
Tutorials Home
|
|