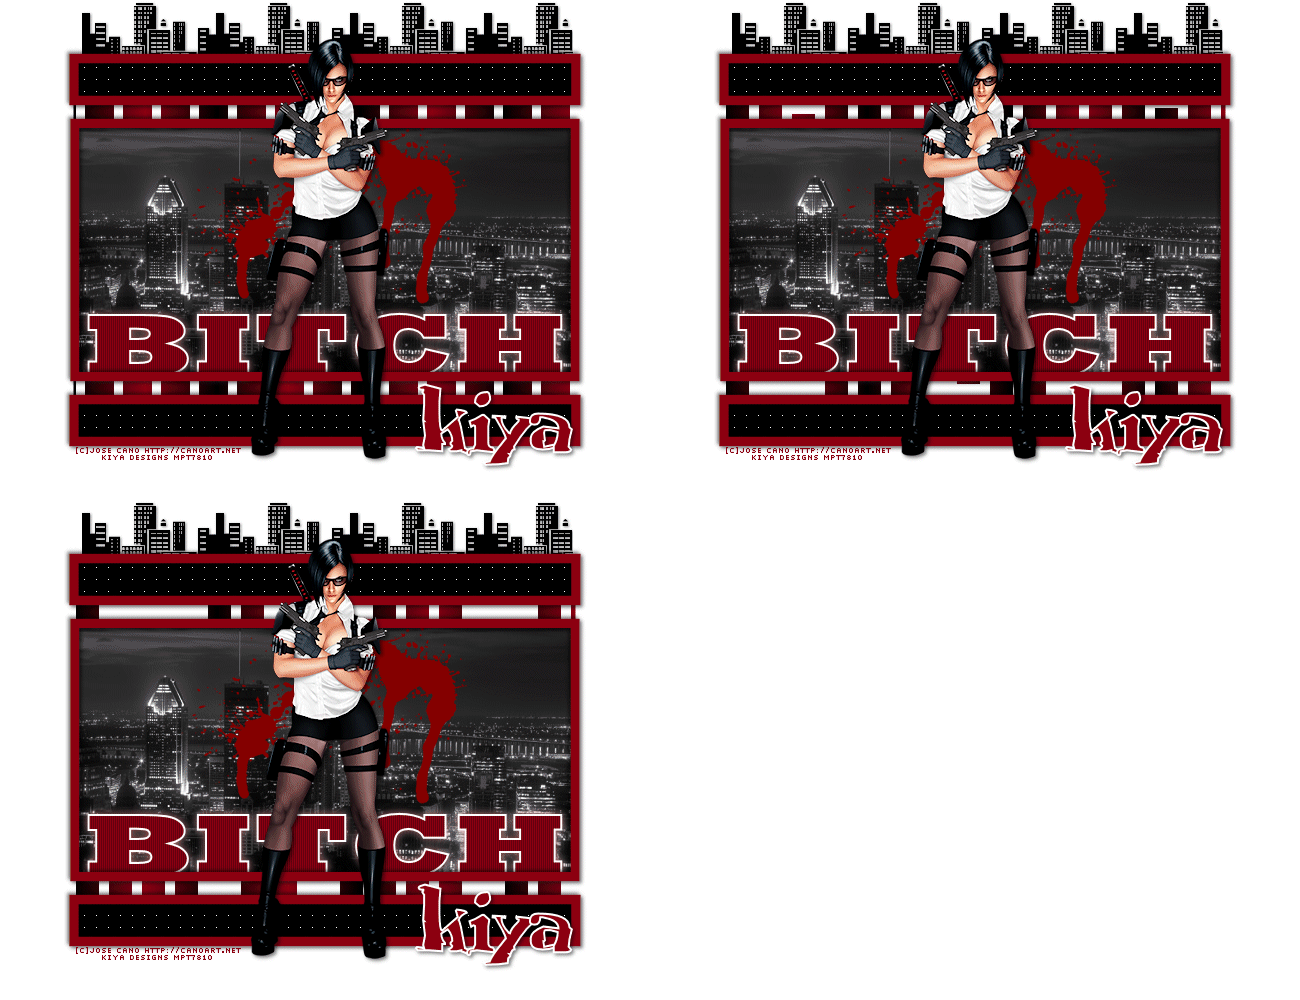
NIGHT BITCH

SUPPLIES NEEDED:
[You Must Have Working Knowledge of PSP!]
Paint Shop Pro Vers. 9+
Animation Shop 3
Your tube of choice. Tube(s) used for this particular tutorial is by Jose Cano. You must have an CANO license to use it.
Plug ins – VM Extravaganza – Shoutin’ and Xero – Mistifier (Go to Nicole’s Filters to search for appropriate filters)
Fonts of Choice or Rockwell Extra Bold and Scrubble
SUPPLIES HERE
REMEMBER TO SAVE OFTEN!
1. Open new image – 650 x 500 – white background.
2. Choose a color from your tube – in my case the red (#8c0114) – set to foreground. Make background black.
3. Go to Rectangle Tool – Rectangle - Width (10)
4. Draw out a rectangle in the middle of your canvas with dimensions no larger than 500x250 (keep note of this by looking at numbers at bottom left of workspace). When done go to Objects – Align – Center in Canvas. Convert to raster.
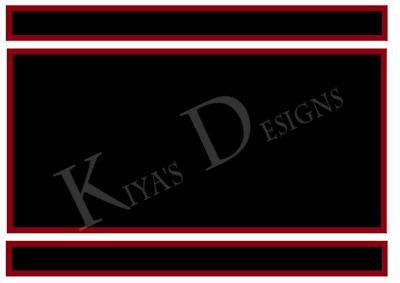
5. Draw out a smaller rectangle above first rectangle – make them as even as possible then Objects – Align – Horiz. Center in Canvas. Convert to raster. Duplicate and flip. Merge all rectangle layers. We’ll consider this our ‘Frame’. It should look like this when done.

6. Magic wand – Mode (Add-Shift), Match Mode (RGB Value), Tolerance (10), Feather (0). Click inside of big rectangle. Delete. Selections – Modify – Expand by 2.
7. Open up city photo. Copy and paste as new layer on your working canvas. Selections – Invert – Delete. Move photo beneath frame. Selections – Select None or Ctrl + D. Sharpen image.
8. Effects – Xero – Mistifier – Default settings.
9. Magic Wand – Click inside both small rectangles making sure you hold down shift key. Go to Effects – Weave – Gap Size (1), Width (11), Opacity (1), Weave Color (Black), Gap Color (White), Fill Gaps checked.
10. On your color palette, set foreground to black, background to your other color picked. Go to gradients –foreground/background – angle (90), repeats (6).
11. Set gradient to background and make foreground null. Make background layer active.
12. Rectangle tools – draw our rectangle behind the frame making sure it doesn’t go over the top or sides. It has to be ‘hidden’ behind the frame. Convert to raster. Duplicate twice for a total of three frames.
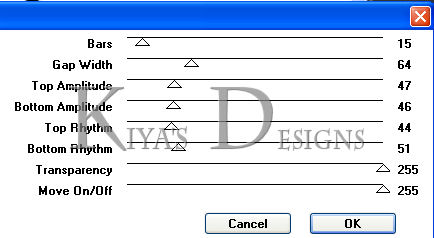
13. Close out top two frames. Make original active – Effects – VM Extravaganza – Shoutin’ – on these settings:

14. Make Copy 1 layer active. Effects – Shoutin’ – play around with the settings – you can mess around with the others BESIDES – Bars, Gap Width, Transparency, Move On/Off. Close out this layer when done and do the same for Copy 2 layer.
15. You can use the wordart I’ve provided or you can make one of your own and write out whatever you want (I used the Rockwell Bold text). Place it right above the picture layer and align it in such a way that it looks as if it’s coming out of the frame.
16. Add any other embellishments you want. In this case it was the blood splatter and the cityskyline tube - just copy and paste tube as new layer and move to top of canvas, then move beneath frame (so it looks as if it's peeking out from behind. Delete excess edges.
17. Add your license information and your name using either the Scrubble or text of your choice.
18. We’re all set! If you want to animate keep going.
ANIMATION TIME:
1. Open up animation shop.
2. Back in PSP, making sure your top two copies of the ‘shoutin’ layers are invisible and only original is active, right click, copy merged.
3. Go back to AS, right click and paste as new animation.
4. Back in PSP - close out original, open up Copy 1.
5. Go back to AS – Edit – Paste After Current Frame.
6. Go back to PSP, close out Copy 1, and open up Copy 2.
7. Go back to AS – Edit – Paste After Current Frame.
8. Edit – Select All.
9. View – View Animation. If satisfied File – Save As and you’re all set!

Please no hotlinking the images! Neither can you use the tags created for your personal use or on blogs or websites without written permission. This tutorial is registered with TWI.
© KiyaSama - all rights preserved. Tutorial Written 17th September, 2010.
Tutorials Home
|
|