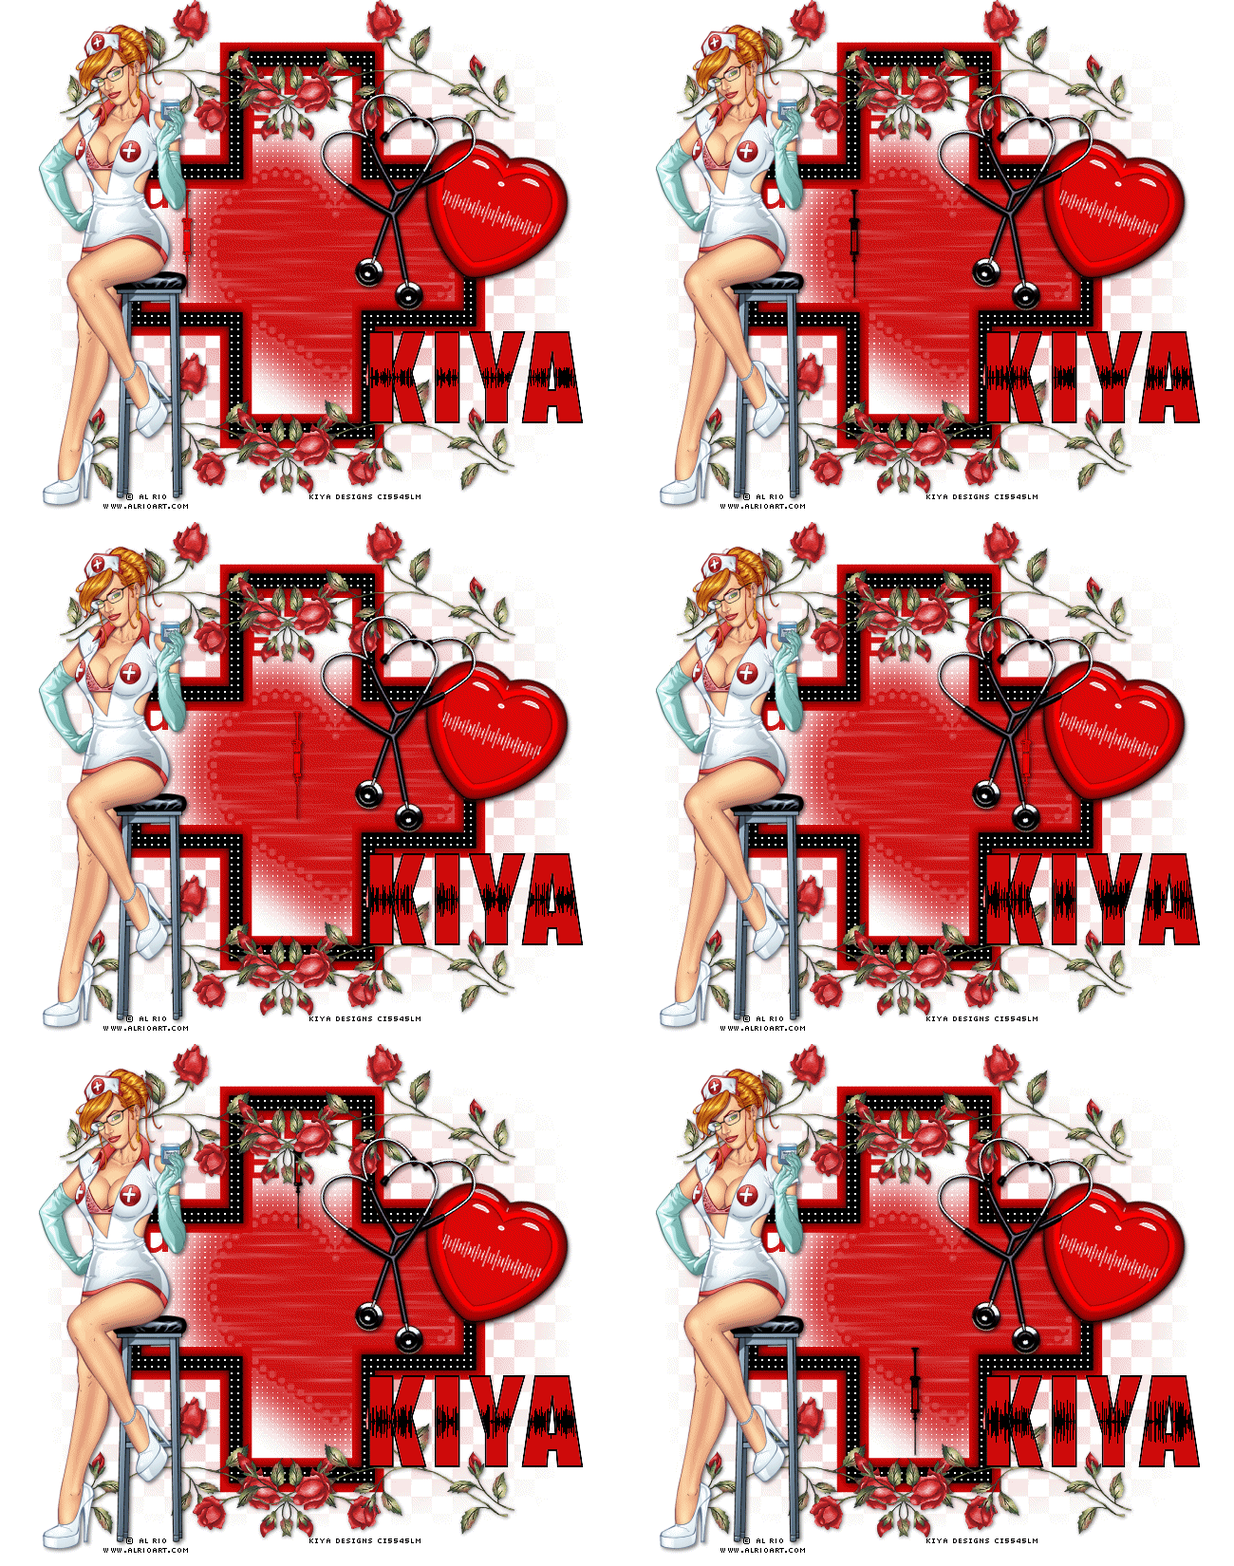
NURSE TO YOUR HEART

SUPPLIES NEEDED:
A tube of choice – I’m using one from Al Rio. You must purchase or have a ADI license to use them. You’re also welcome to use a tube of your choice.
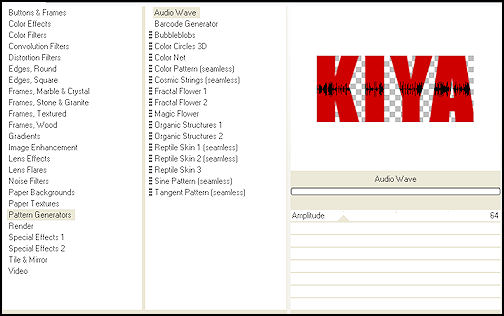
Plug-ins - Filters Unlimited 2.0 - Pattern Generators - Audio Wave - DEMO can be downloaded HERE
Mask by Becky/Extra tubes
Cross Animation by Me - SUPPLIES
Font of choice or Impact
Jasc Animation Shop 3
REMEMBER TO SAVE OFTEN!
1. Open new image 650x550 – transparent UNCHECKED – color white.
2. From your supplies, open the cross animation template – ignore the message box that pops up – we only want to position it on our tag so we know where to place our tubes and other goodies.
3. Copy and paste template as a new layer on your tag. It will automatically be positioned in the middle.
4. Copy and paste your tube on the tag and position as you’d like. Apply light drop shadow settings – 2, 2, 50, 5.
5. Using your dropper tool, choose the red hue from the cross (#cc1515). This should automatically fill your foreground color palette.
6. Create new raster layer above the white background. Choose your floodfill tool and fill this layer with your red color.
7. Open your mask – Layers – New Mask Layer – From Image – Choose Mask from drop down menu – make sure source luminance and invert mask data are checked. Apply. Delete and ungroup layers.
8. Now it’s time to add whatever other elements you’d like to make your tag pretty. Remember that these must be placed above your tube layer. For my tag, however, I copied and pasted the rose as a new layer below the nurse tube. Layers – Duplicate – Image – Mirror. Merge down these two layers. Duplicate this merged layer and Image – Mirror – Image – Flip and position at the top of your tag. Merge down this layer with the first rose layer and apply light drop shadow of choice.
9. On a new raster layer, add your license and copyright information.
10. Choose your text tool – Font Impact – Vector – Foreground color black, background color white – Size 120 – stroke width 2.0 – Kerning 40 (this will depend on how long your name is – since mine is short, I can go this wide)
11. Once happy with how your text looks, copy and paste this layer ONLY as a new image. Delete this layer on your original tag as we won’t be needing it there anymore.
12. On your name text only image – select your magic wand and click inside each letter of your name. Mode (Add/Shift), Tolerance 10, Feather 0. Anti-alias checked.
13. Duplicate your selections/layer six times for a total of 7 layers.
14. Set your foreground color to black and your background color to the same red you used for your mask background.
15. Make your first selected layer (on your name text active) and go to Effects – Plug ins – Filters Unlimited 2.0 – Pattern Generators – Audio Wave with these settings:

16. Do NOT deselect yet! Go to your next layer and move amplitude slider to 74.
17. Layer 3 – 100, Layer 4 – 88, Layer 5 - 120, Layer 6 – 100, Layer 7 – 130. Once done – Selections – Selections None.
18. Now it’s time to animate!
19. On your main tag layer – delete the cross animation layer. We won’t need that.
20. Click on the ‘eye’ of your tube, extras and text/license info layers. The only layers open should be your white background and mask layer. Make one of these active. Right click on your tag and copy merged.
21. Go to Animation Shop and paste as new animation. Hold down your Ctrl key and press the letter L , six times – you can see the frame increment on the right hand side/bottom of your screen. Once you get to seven frames, stop. Edit – Select All.
22. Open the cross animation from the supplies provided. You’ll see that it has seven frames as well. Edit – Select All.
23. Making sure you’re on the first frame of your cross animation, carefully drag the image into the first frame of your tag. Release your mouse and you’ll see all seven frames of the cross now in each frame of your tag.
24. Back to PSP – Close out your background and mask layer and make every other layer active. Copy merged and paste as new animation in AS.
25. Repeat the duplication procedure as above – we want seven frames of this. Edit – Select All. Again, making sure you’re in the first frame, drag this into the first frame of the cross/bkg/mask animation. Release the mouse and everything will fall into place.
26. Back to PSP. Remember your name text layer? Save that as a .pspimage, making sure all layers are open and none has been ‘X’ed out.
27. Back to AS. Open up your name text image – all seven frames will be displayed. Repeat the drag and drop procedure – positioning the name text where you want it on your tag.
28. All done? Great! Go to Animation – Animation Properties – Opaque – White. Animation again - Frame properties this time and set to 40.
29. View – animation and check out your finished product! Hope you enjoyed the tutorial! :)
Please no hotlinking the images! Neither can you use the tags created for your personal use or on blogs or websites without written permission. This tutorial is registered with TWI.
© KiyaSama - all rights preserved. Tutorial Written 13th June, 2009.
Tutorials Home
|
|