
OLYMPIC DREAMS
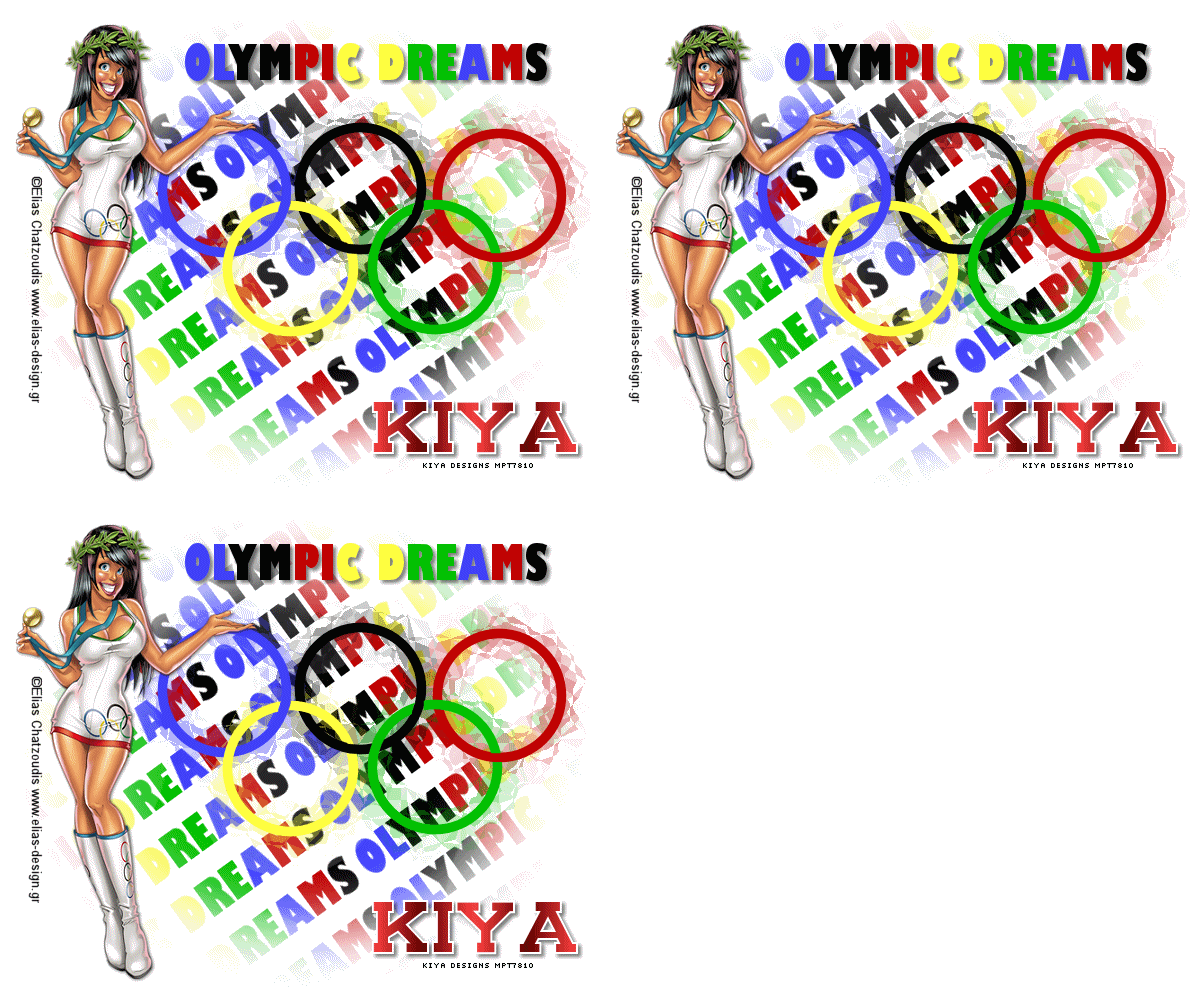
SUPPLIES NEEDED:
Tube of Choice – I’m using a fabulous tube from Elias Chatzoudis. You must purchase or have an ELIAS license to be able to use it.
You’re also welcome to use any other tube of your choice.
Plugins – Xenofex 1.1 – Origami
You can purchase plugin or use demo here here
Plugins - MuRa Meister - Copies
You can download free version here
Mask of choice – I’m using Becky’s Mask 019
If anyone knows where this mask came from, please do not hesitate to let me know!
Animation Shop 3
1. Open transparent image, 600x500. Floodfill white and merge flatten to make background.
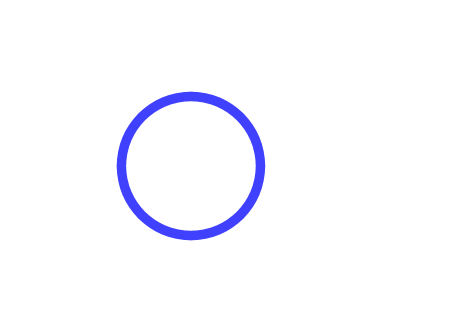
2. We are going to draw the Olympic rings. Go to preset shapes, Ecllipse, width – 10, create on vector checked, anti-alias checked, foreground blue (#4040ff), background null. Go to center of your image and draw a medium-sized circle. Like so:
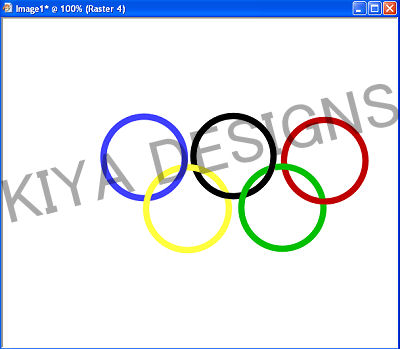
3. Convert to raster layer. Change foreground color to black (#000000) – draw another circle – same size and covert to raster. Next draw red (#c00000), then yellow (#ffff40) and last green (#00c000). You should now have five circles on your image. (Make sure you don’t forget to convert each to raster layer before drawing the next!) Rearrange them to look like so:
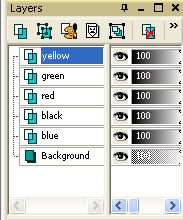
4. Rename each layer with the color name and arrange it like so:
5. Now comes the tricky part – using your eraser brush (size:5, hardness:50, step: 25, density/thickness: 100, rotation: 0, opacity:100), carefully erase bits of the yellow and green circles, so it would look as if it’s intersecting with the circles above.
6. All done? Great. Now close out background and merge visible. Move circles towards the right side of image…just enough to leave room for your tube. Rename this layer ‘circles’. Go to layers, duplicate. On original layer, go to Adjust – Blur –Gaussian Blur – 10. Duplicate this layer two more times for a total of three. So now, you should have three layers of ‘blurred circles’.
7. Close out top two duplicated blurred circles layer, and on the original version, go to plugins – Xenofex 1.1 – Origami – Fold size - 15, Random seed – 38. Click on OK. Close out that layer, open the next layer above it. Set random seed to 52. Close out this layer and open the last blurred copy, and set random seed to 48.
8. Open up tube of choice. Copy and paste (resize if needed), as new layer, on the left side of the image. Add light drop shadow 1,1, 50, 5.
9. Now add your Olympic phrase of choice – I’m using ‘Olympic Dreams’ – font – Gill Sans Ultra Bold, size -36, alternate colors of characters using the Olympic ring colors. Duplicate this layer and on the original, go to MuRa Meister’s copies – Tiling – with these settings:
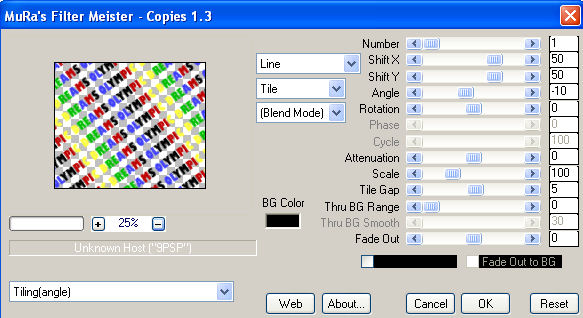
10. Move tiled layer down to right above the white background – lower opacity to 44. Now apply your mask – layer, load/save mask, mask from disk and choose correct one of choice – delete and then ungroup layers. Go back to original text and add drop shadow – 3, 3, 50, 5.
11. Add your name, copyright and license info. I used Carnarsie Slab JL – size 48, foreground white, background a gradient of choice, 2.0.
ANIMATION TIME!
1. Remember those three blurred circle layers? Great! Close out the top two layers and copy merged, paste as new animation in Animation Shop.
2. Back to PSP, close out bottom layer, choose the middle one, copy merged and paste after current frame in Animation Shop.
3. Back to PSP, close out middle layer, pick the top one, copy merged and paste after current frame in Animation Shop.
4. You should have three frames in Animation Shop. Edit, Select All. Animation – Animation Properties – opaque – white. Now view animation and you’re all set.
Please no hotlinking the images! Neither can you use the tags created for your personal use or on blogs or websites without written permission. Tutorial has been registered under TW1.
© KiyaSama - all rights preserved. Tutorial Written 16th March, 2009.
Tutorials Home
|
|