
PAPER MOON
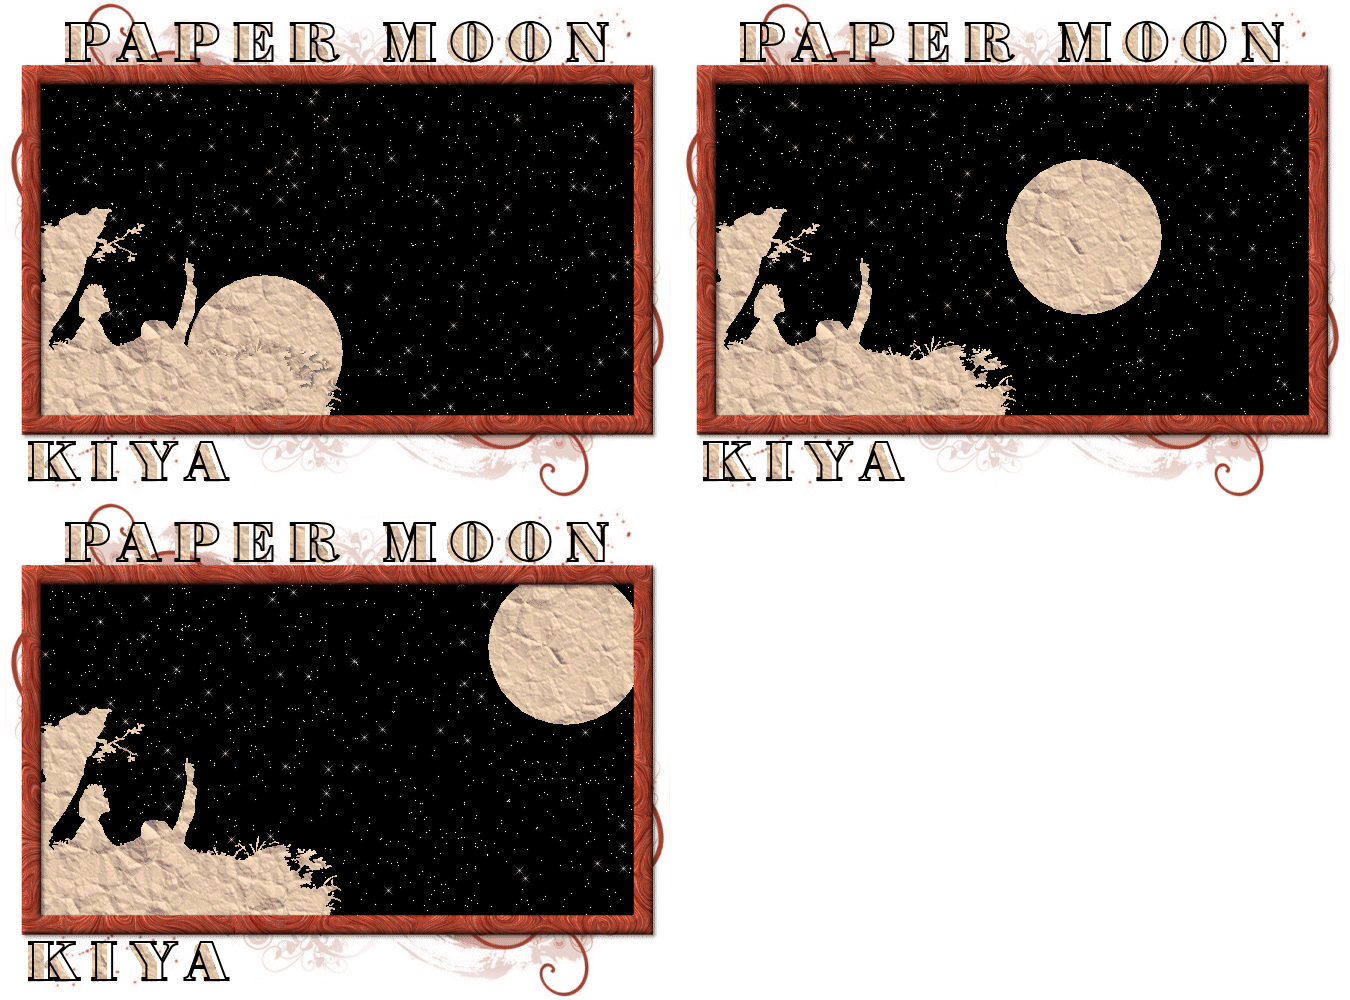
SUPPLIES NEEDED:
No tubes this time…shocker, eh? Instead, we’re using a silhouette image from my daily weekly Dover Sampler which is attached in the supplies zip file. However, if you have another silhouette of choice, that works too.
Plug ins – Xenofex 2 – Crumple and Constellation
Eye Candy Textures - Swirl
Mask and Background template (as well as silhouette) – SUPPLIES
Fonts of choice or – Poster Bodoni BT
Animation Shop 3
1. Open up transparent image – 675 x 500 – Flood fill white and merge down to form background layer.
2. With your foreground color set to black and your background color on null, choose the rectangle preset shape. Stroke width on 20, draw out a rectangle to fill just about the majority of the image. Objects > Align > Center in Canvas. Convert to raster.
3. Go to Effects > Plug ins > Eye Candy Textures > Swirl, Solid, Medium Spirals. Don’t fiddle with the numbers or anything. Just use as is.
4. Using your magic wand, tolerance set to 10, click inside the rectangle. Selections > Modify > Expand by 5. Create new raster layer and flood fill with black.
5. Move this black layer beneath the swirl frame and duplicate twice for a total of three layers.
6. Open your silhouette image. Selections > Select All > Float > Defloat. Create new raster layer and flood fill with white.
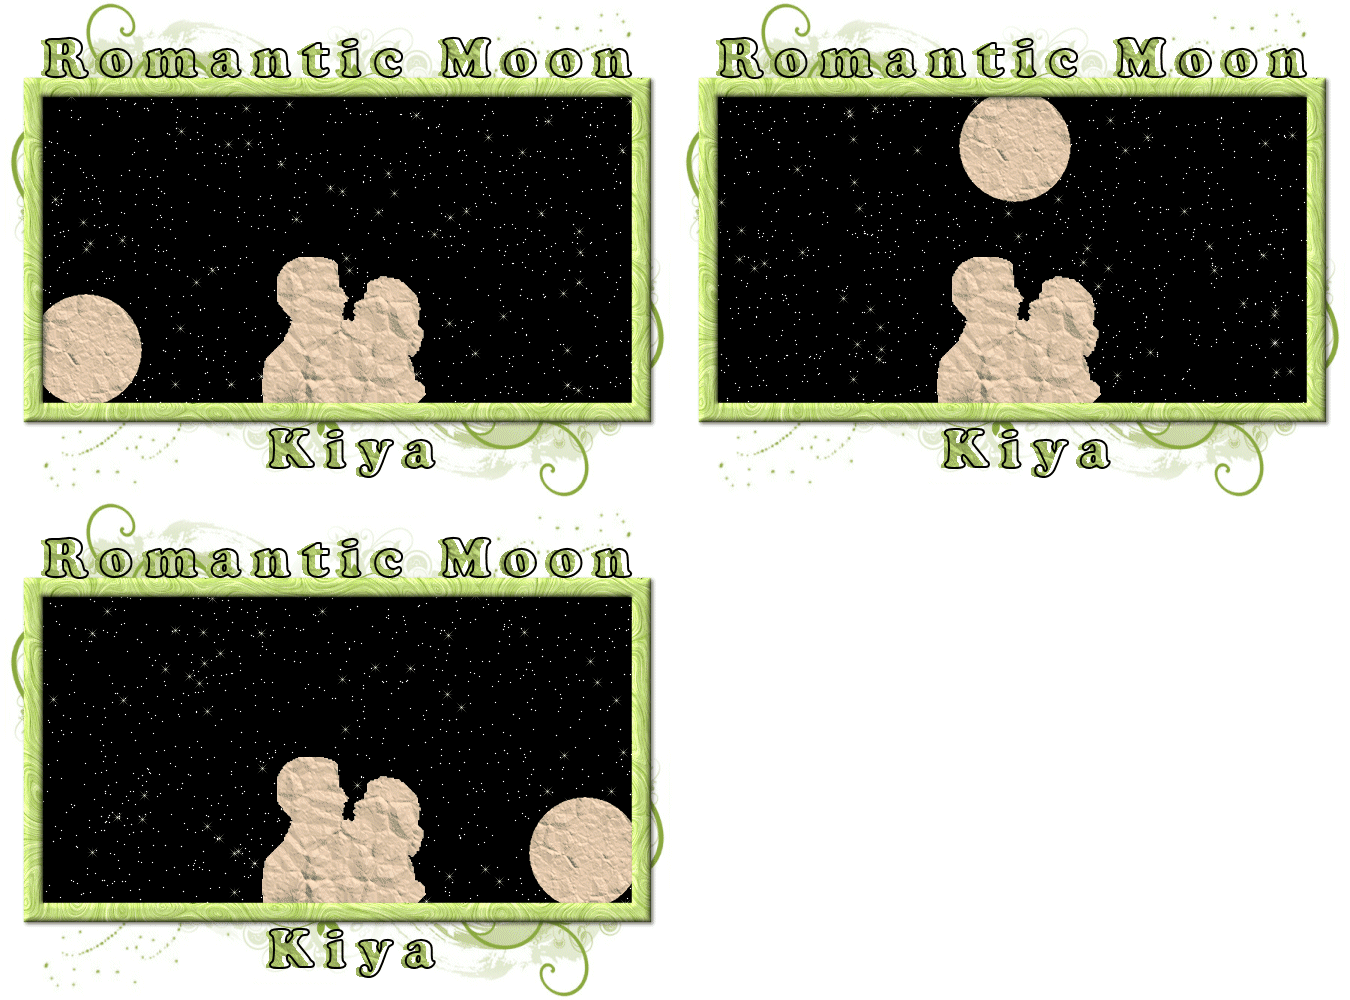
7. Copy and paste your silhouette above the topmost black layer. Position on the lower left side of the tag – see mine for reference. Add light drop shadow of choice.
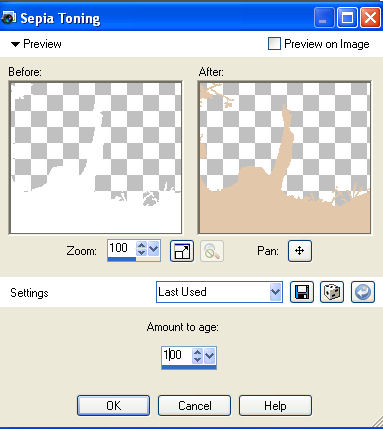
8. Go to Effects > Photo Effects > Sepia Toning on these settings:
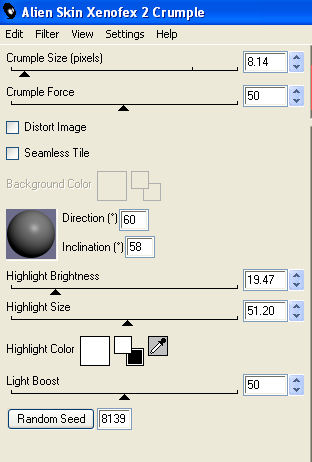
9. Go to Effects > Plug ins > Xenofex 2.0 > Crumple on these settings:
10. Now go back to your black layers. Close out the top two layers and on the original, go to Xenofex 2.0 > Constellation > Settings > Small Field Constellation. Do not fiddle with the numbers. Just use as is.
11. Close out this layer and move to the next. Apply constellations again, but this time click on the random seed twice, and then hit OK. Repeat this for the last black layer.
12. Now for our ‘moon’. Open the paper template provided. Go to your selection tool and choose the circle (or eclipse) option. Draw out a small circle in the middle of the template like so:
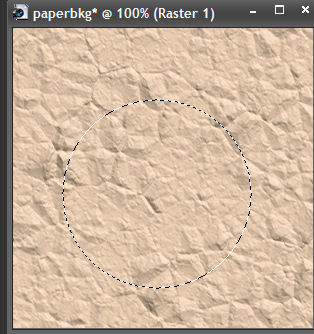
13. Cut and paste as new layer right below the original silhouette image. Position in such a way that it looks as if it’s coming out of the ‘grass’.
14. Duplicate the moon and move it a bit higher on the tag (we’re trying to simulate a moon rising). Duplicate this layer and move it higher still in such a way that it seems like it’s disappearing into the frame.
15. All done? Fabulous! Go back to your swirly frame and apply bevel to these settings:
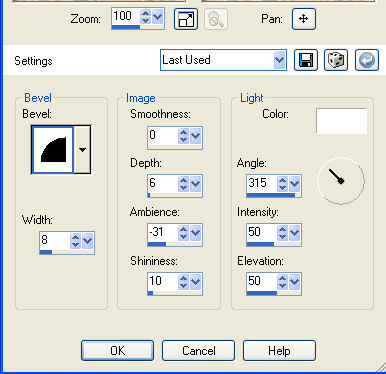
16. Apply light drop shadow.
17. Pick a color from the frame – looks brownish – create a new raster layer above the white background and flood fill with this color.
18. With your mask image open, go to Layers > New Mask Layer > From Image > Select Mask 6 from the drop down menu. Make sure invert data and source luminance are checked. Click OK. Delete the middle mask layer, click on the top mask layer, right click and choose the ungroup option.
19. Now for the phrase and your name. Hopefully, your paper template is still open on your workspace because we’re going to need it again really soon.
20. With foreground set to black and background on null, Poster Bodoni font, size 55, stroke width 2.0, vector, kerning 200. Write out the phrase ‘PAPER MOON’ above the tag. Position and convert to raster.
21. With your magic wand, click inside each letter carefully, making sure your settings are on the Add(Shift) option, tolerance 10. Selections, Modify, Expand by 1.
22. Create new raster layer. On your foreground, go to patterns and choose the crumpled paper template. Now fill your new layer with this. Move this layer, once done, beneath the ‘black frame’ of your phrase. Carefully move this ‘paper’ layer a little to the left, so it looks like a drop shadow…of sorts ^_^. Merge down.
23. Repeat this for your name and you’re now ready to animate.
24. If you’ve been keeping up with my tuts, you should know how the animation process goes by now. Only this time, in frame properties, set it to 120.
25. Hope you enjoyed the tutorial! If you have any questions, don’t hesitate to send me an email at anytime: kiyasama@yahoo.com
Please no hotlinking the images! Neither can you use the tags created for your personal use or on blogs or websites without written permission. This tutorial is registered with TWI.
© KiyaSama - all rights preserved. Tutorial Written 9th April, 2009.
Tutorials Home
|
|