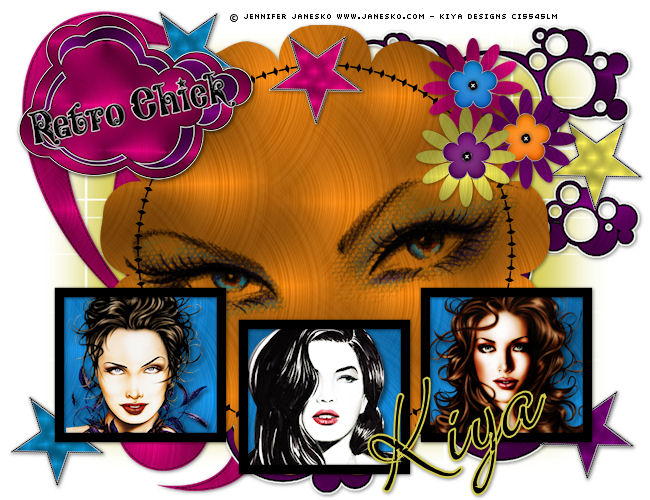
RETRO

SUPPLIES NEEDED:
4 tubes of Choice – I’m beautiful artwork from Jennifer Janesko. You must purchase or have an CDO license to be able to use it.
You’re also welcome to use any other tube of your choice.
Fantastic template_11 and Scrap Kit (called Retro Girl) by the talented Lacarolita. It’s FTU and can be downloaded on her blog page HERE
Optional - Mask of choice. I'm using WSL_Mask149
[You can download her awesome masks from her site here]
1. Open template and delete top layer with copyright information.
2. Highlight layer #3 – the three light gray squares – Selections, select all, float, defloat – you should now see little ants around each square.
3. Select Paper #10 from scrap kit – copy and paste on template – selections, invert, delete. Select None. Now make sure you delete three gray squares, so the edges don’t look unsightly.
4. Highlight layer #4 – borders around squares – selections, select all, float, defloat – with your foreground color set to black (#000000) – create new layer and flood fill with the color. Select none.
5. Still on layer #4, use your magic wand, set to these values:

6. Click on each square – selections, modify, expand by 3. Leave selected.
7. Now, copy and paste three of the tubes – preferably close ups – resize as deem fit and move them into each box. Selections, invert, and then making sure you go to each tube layer, delete. Move all tubes right below the black border, select none and add drop shadow to each tube. 3,3, 50, 5.
8. Now highlight Raster #1 – the big flower bkg – selections, select all, float, defloat. Go to scrap kit and pick Paper #6, copy and paste, invert and delete – remember to delete original gray bkg.
9. Depending on what kind of tube you have, it’s time to copy and paste it on the layer. Since mine is just eyes, I don’t have to crop anything, but if you have a full or half-body tube, try and make it seem as if its coming out of the middle square. Add light drop shadow.
10. Now for the flowers! Go to Raster #5, selections, select all, float, defloat, using Paper #9, copy and paste, invert, delete. Select none. Delete original layer. Do the same with the other flower layers, using the other solid colors of the scrap kit.
11. And now for embellishments! To cover up the ‘holes’ in the flower layers, I used the pretty flower elements – resizing them to 10%. Play around with the different colors and see my tag for reference.
12. Close out all layers except for flowers and flowers embellishment. Merge visible and apply light drop shadow.
13. Open up Raster 3 – this should be the black borders - and apply a light drop shadow as well. Once done, open up tubes and blue bkg and merge visible. You should now have your settings like this:

14. You can play with more of the embellishments as you choose. I used the Stiche #4, copy and paste and place right above white bkg. Resize to about 80% and move to the left side of the image. And Circ 11 – resize to 80%, paste as new layer above stiche and move to the right side of the image. Merge down and add light drop shadow. Add a light drop shadow to your gold-ish flower frame too. Merge down.
15. I also used the stars, resized them to about 20% and pasted them all over the image – merge all the stars when done and apply light drop shadow.
16. Also optional is the use of the mask. Choose a color from one of the embellishments as your foreground color. Create new layer, right above the white background, floodfill and apply mask, delete and ungroup layers.
17. Add your name, copyright and license info. Font used was: Elegant, size 120, foreground – any light color from your tag – background was black. Vector and rotate. Covert to raster and add drop shadow of choice.
18. Merge all flatten and you’re all set! ^_^
Hope you liked the tutorial and please feel free to email me with your results or any questions you might have.
Email to: kiyasama@yahoo.com
Please no hotlinking the images! Neither can you use the tags created for your personal use or on blogs or websites without written permission. Tutorial has been registered under TW1.
© KiyaSama - all rights preserved. Tutorial Written 17th March, 2009.
Tutorials Home
|
|