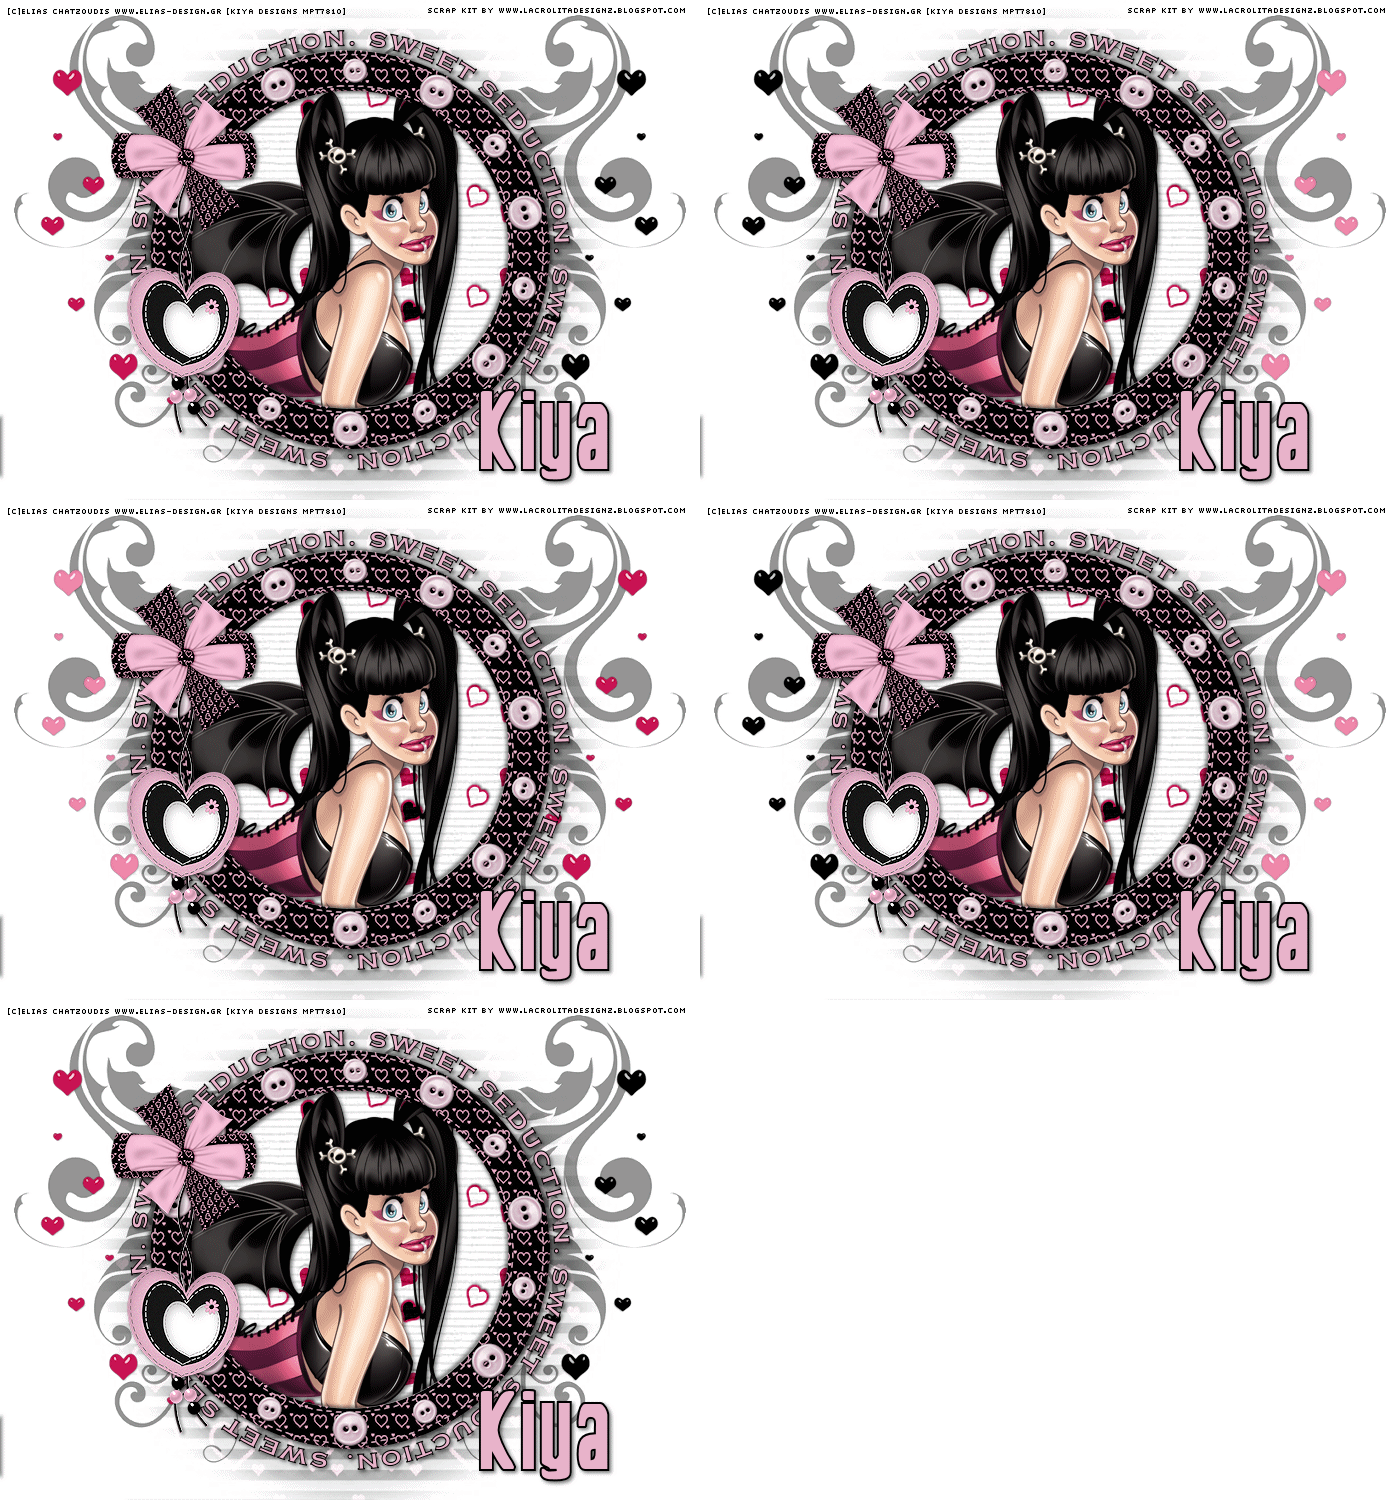
SWEET SEDUCTION

SUPPLIES NEEDED:
A tube of choice – I’m using the hunkalicious one from Elias Chatzoudis. You must purchase or have a ELIAS license to use them. You’re also welcome to use a tube of your choice.
Lovely FTU Scrap kit – Seduction – by Lacarolita Designz. You can download it from her blog HERE
Mask by Weescotslass
Word Art by Me / Doodle - SUPPLIES
Fonts of choice or – Vanilla Boys
Jasc Animation Shop 3
REMEMBER TO SAVE OFTEN!
1. Open image 700x500 – transparent – flood fill with white.
2. From scrap kit open Frame 3. Copy and paste as new layer and resize by 40%.
3. Using your magic wand, settings on Add (Shift), Feather 0, Tolerance 10, click inside the frame. Selections – Modify – Expand by 5.
4. From scrap kit, choose Paper 2. Copy and paste as new layer on working image. Selections – Invert – Delete. Move paper layer beneath the frame. Selections – None or Shift + D.
5. Back to your frame layer. Click inside with same settings of your magic wand.
6. Choose your tube. Copy and paste as new layer on working image. Selections – Invert – Delete. Move tube layer beneath frame. Selections – None or Shift + D.
7. Add light drop shadow to your tube- Effects – Drop Shadow – I’m using settings 2, 2, 50, 5. Color – Black –Shadow on New Layer UNCHECKED.
8. Make frame layer active. Apply same drop shadow. Repeat but this time, change H and V to -2 (negative 2).
9. From kit, choose embellishment heart 1 – Copy and paste as new layer on your tag and resize by 30%. Position as you see on my tag.
10. Choose Bow 9 from kit – copy and paste as new layer and resize by 30%. Move as you see on my tag and position. Merge down these two layers and apply same drop shadow as above.
11. From kit, choose hearts 3, 4, and 5. Now we’ve got to be pretty careful with the next few steps.
12. Copy and paste Hearts 3 (black hearts) right above your white background layer. Resize by 50% and then resize by 80%. Move towards the right side of your tag and position as you see on my tag. Rename this layer ‘black’. Duplicate this layer and go to Image – Mirror.
13. Copy and paste Hearts 5 (pink hearts) as a new layer. Rename as ‘pink’. Repeat the same re-sizing process as above. Once done, make sure you position the pink hearts directly above the black – you do this in such a way that you cannot see the black hearts when done. Duplicate this pink layer and mirror.
14. Copy and paste Hearts 4 (red hearts) as new layer. Rename as ‘red’. Repeat same steps in 11 and 13. When done, you should have a total of six layers of the hearts.
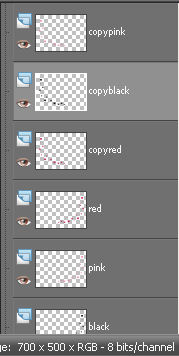
15. Now time to do some layer arranging. Move the original black, pink, and red hearts so they’re one on top of the other. Then you can rearrange your duplicate layers in any position you want. When done, you should have something like this:

16. From kit, choose Paper 4. Resize by pixels 700x700 – Copy and paste as new layer right above the white background layer.
17. Apply mask if you’ve uploaded it to your mask folder, if you haven’t, simply open mask image on your workspace. Go to Layers – New Mask Layer – From Image – select mask from drop down menu – source luminance and invert mask data CHECKED.
18. Delete middle mask layer (on your palette) and ungroup layers. Resize this layer by 90%.
19. Open doodle image provided. Copy and paste as new layer above the mask layer. Move towards the left side of the tag (see mine for reference). Reduce opacity to about 50%. Duplicate and mirror. Merge down these two layers together.
20. Now you can add any other extra elements from the kit you’d like – just make sure you apply them on the topmost layer, so it’s visible and resize as necessary.
21. Open word art provided. Copy and paste as new layer right above the frame layer. It already has a drop shadow, so you don’t have to add another.
22. On the topmost layer, Layer – New Raster Layer - add your copyright and license information.
23. Choose your font tool – set to Vector – Font style – Plump MT – Size – 72 - Stroke Width 2.0 – set foreground color to black and background to a color from your tube. I used color #e9b3cb.
24. Write out your name/phrase. Convert to raster and add light drop shadow.
ANIMATION TIME!
25. Remember our heart layers? Great. Make your white background layer active. Close out layers ‘pink, red, copy black and copy pink’. You should have only layers ‘black’ and ‘copy red’ open (for the hearts layers that is). Right click on tag and copy merged.
26. Open Animation Shop and paste as new animation.
27. Back to PSP. Close out ‘black and copy red’ layers, open up ‘pink and copy black’ layers. Copy merged and paste after current frame in AS.
28. Back to PSP. Close out ‘pink and copy black’ layers, open up ‘red and copy pink’ layers. Copy and merged and paste after current frame in AS.
29. You should now have three frames in Animation Shop. Edit – Select All – Edit – Duplicate Selected.
30. You should now have 6 frames. Holding down your Ctrl key, highlight frames 4, 5 and 6. Animation – Reverse frames.
31. Edit – Select All – Animation – Animation Properties – Opaque – click in the box and choose white. Animation – Frame Properties and set to 25.
32. View animation and you’re all set. Save as .gif file.
33. Hope you enjoyed the tutorial!
Please no hotlinking the images! Neither can you use the tags created for your personal use or on blogs or websites without written permission. This tutorial is registered with TWI.
© KiyaSama - all rights preserved. Tutorial Written 27th May, 2009.
Tutorials Home
|
|