
SIMPLE SMILEY

SUPPLIES NEEDED:
Paint Shop Pro 7+
Optional: Brushes of choice, extra tubes of choice, scrap kit elements of choice.
REMEMBER TO SAVE OFTEN!
1. We’re going to make our own smiley faces, but with some character/personality. ^_^ This should be a fairly easy tutorial and it only encourages you to play around with your program and explore the features used in this tutorial a bit more.
2. Open a new image – 300x300 – color white, transparent UNCHECKED.
3. Set your foreground color palette to null and background to yellow (#ffff40).
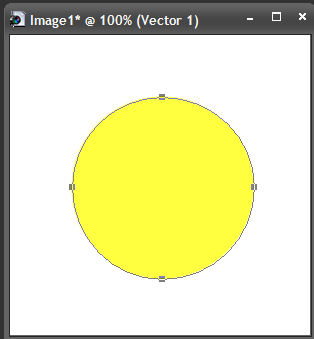
4. Choose your preset tools – ellipse – Draw Circle selected – and draw out a medium sized circle in the middle of your image. You should have something like this:
5. Go to Objects – Align – Center in Canvas. Convert this layer to raster by right clicking on the layer (in the layer palette) and choose the option from the menu that pops up.
6. Selections – Select All – Float. Selections again - De-Float.
7. Effects – Artistic Effects – Balls and Bubbles – Check the ‘Single Ball or Bubble’ option and then check the ‘Maximum Possible Size’ box.
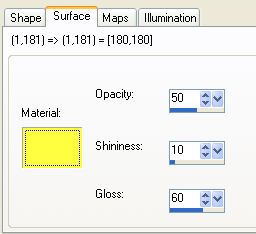
8. Click on the surface tab and go with these settings (the yellow color is the same you used above):
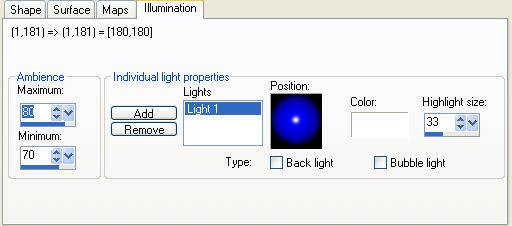
9. Click on the Illumination tab and go with these settings:
10. Apply and then Selections – Selections None.
11. Let’s soften up the edge a bit. Choose your ‘soften’ tool, and with these settings:

– trace around the edge of your circle carefully.
12. Choose your presets tool – Ellipse again. Set foreground color to null and background color to white. Draw out a small circle like so:
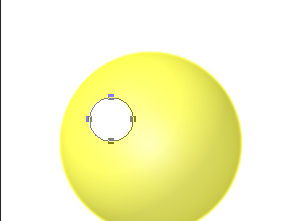
– Convert this layer to raster.
13. Set your background color to black and now draw a small circle inside of the white like so:
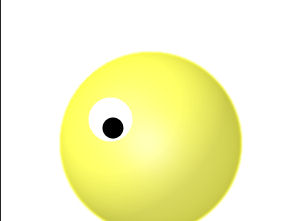
– again convert to raster when done.
14. On your white layer (eyeball layer) – Effects – 3D Effects – Inner Bevel with these settings:
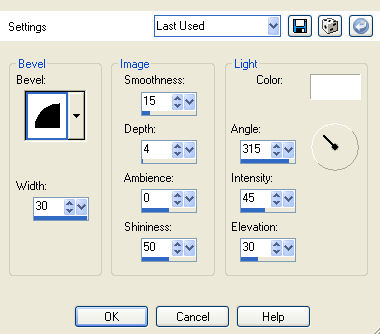
15. Make your black (iris layer) active and merge down with the white eyeball layer.
16. Effects – 3D Effects – Drop Shadow with these settings and color (#808000):
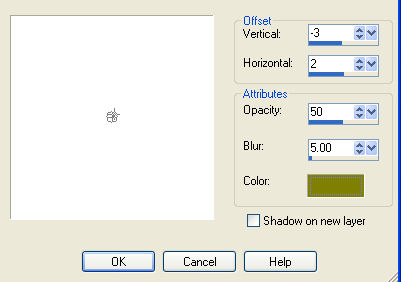
17. Duplicate the eye layer and go to Images – Mirror – position appropriately. Merge these two eye layers together.
18. Time to draw the mouth! With our background layer still on black, go to presets – Ellipse – Draw Ellipse and draw out an oval shape for the mouth like so:
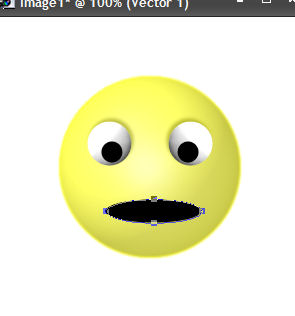
19. We want our face to look like it’s smiling though, so go to Objects – Convert to Path.
20. Choose your pen tool. Making sure your ‘edit’ tool is active, pull on the nodes (especially the left and right ones of the mouth) and move them up a little to form a smile (or downward if you want it frowning). When satisfied, covert the layer to raster.
21. Apply the same drop shadow settings as above with the same color used to give our mouth some depth. Repeat drop shadow settings, only this time, switching the numbers around.
22. You should now have something like this when done:

23. Make your main yellow base (body) active and apply drop shadow with settings H & V – 2, Opacity – 50 and Blur – 10 – color #808000.
24. And that’s it! Your very own smiley face! You can have tons of fun with them by adding little things here and there to make them pretty. For my main example, I added a new raster layer above the white background, applied a brush of my choice and then added fun text phrases.
25. See below for other variations, using different colors/textures and adding either scrap kit elements or even items from your PSP tube section to make them all fun.
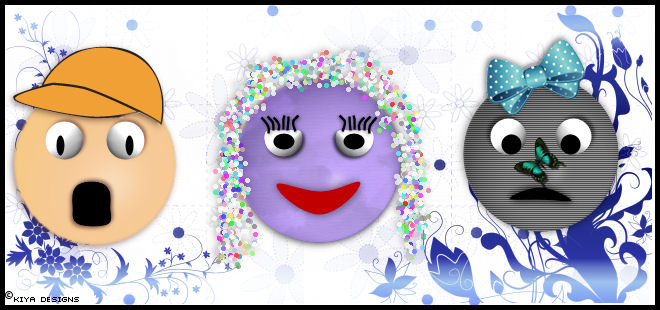
Please no hotlinking the images! Neither can you use the tags created for your personal use or on blogs or websites without written permission. Tutorial has been registered under TW1.
© KiyaSama - all rights preserved. Tutorial Written 3rd June, 2009.
Tutorials Home
|
|